A small business website, free: pick a template, edit it by asking, publish
Last updated: 2026-11-11
Contents · 7
- 1. Browse templates by business type — no login needed
- 2. Preview it, then click “Start a site with this template”
- 3. Make it yours — click the page, or just ask
- 4. Add an inquiry form so customers can reach you
- 5. Click “Publish” — connect your own domain only if you want one
- Frequently asked questions
- Read next
Short version — pick a template for your kind of business in the gallery, type your shop name, and the editor opens. Click the text and photos to change them or ask AI in plain words, then click “Publish” and the site opens at an address like myname.mklyr.com — all of it on the free plan.
At a glance
- Time needed
- About 15 min
- Plan required
- Free plan
- Coding knowledge
- None
- Where to do it
- Template gallery
Step by step
- 1
Browse templates by business type — no login needed
The /templates gallery opens without logging in. Type your kind of business or a feature you need into the search box (café, booking, portfolio), or just browse the categories. Preview two or three that feel like your shop and pick the one you like best.
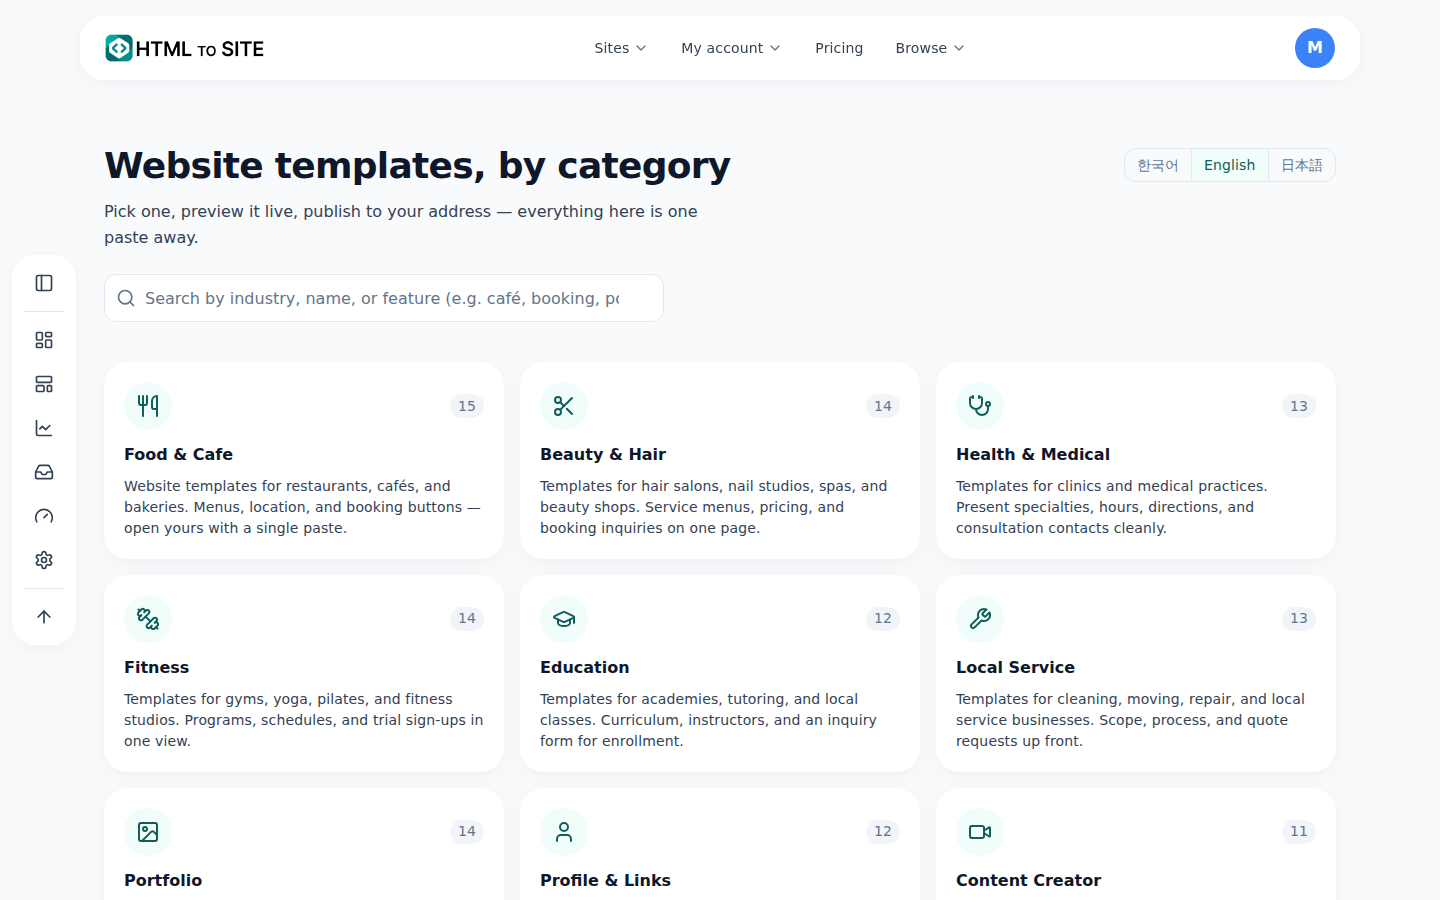
This is the real screen. You can browse it by industry without logging in. - 2
Preview it, then click “Start a site with this template”
Every template has a live preview that really works, and the Mobile, Tablet and Desktop buttons show how it will look on a customer's phone. When you like one, click “Start a site with this template”, type your shop name on the “Enter your shop name” screen (the address follows the name, and “Change” lets you edit it), then click “Create with this design”. You log in at this step only if you need to, and the editor opens with a draft nobody can see yet.
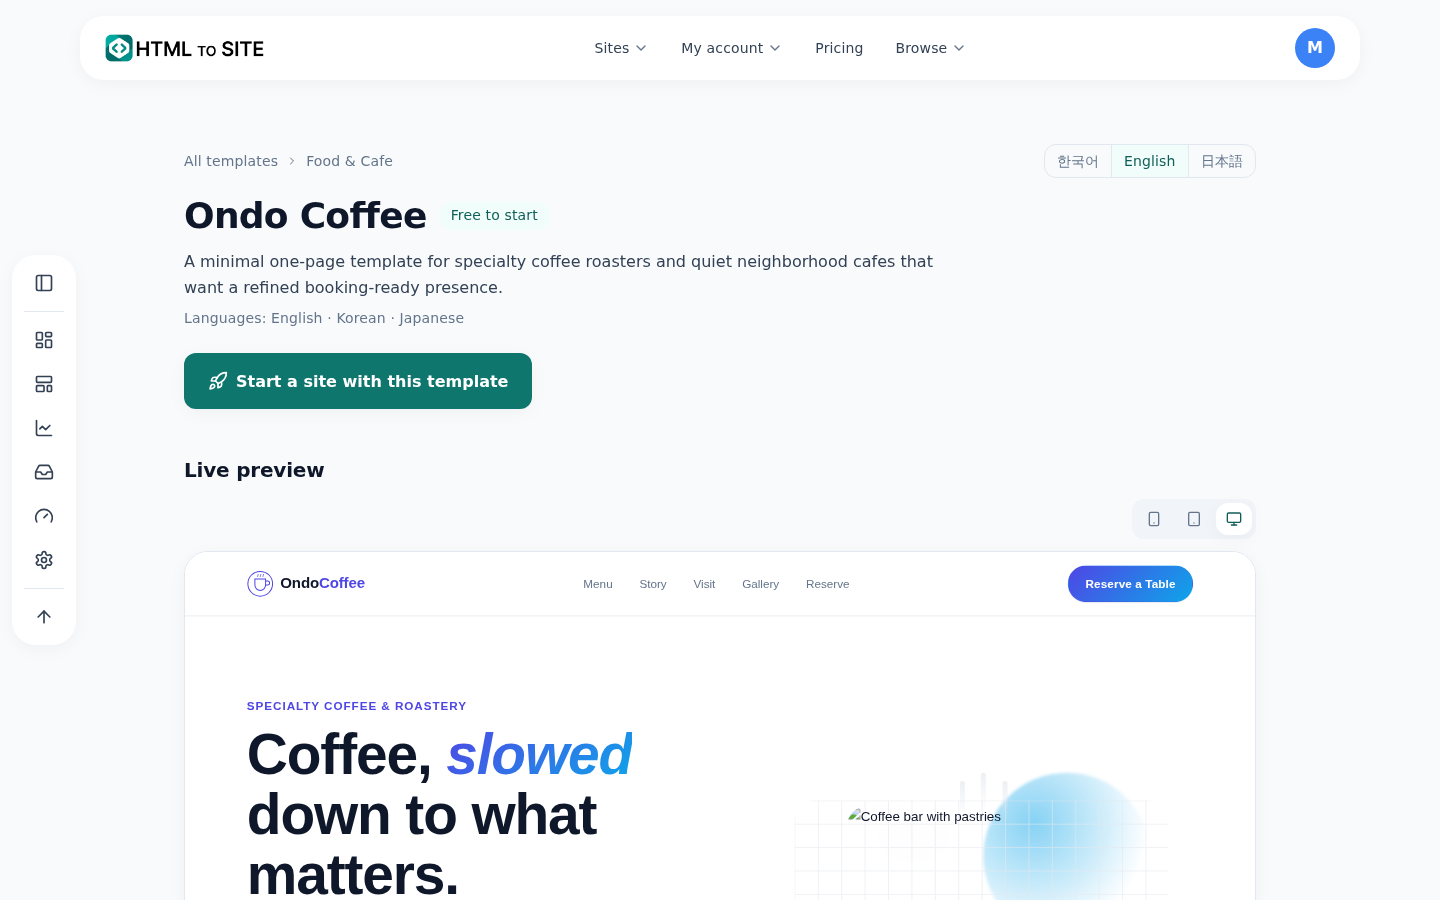
Check the phone view in the preview before you start. - 3
Make it yours — click the page, or just ask
In the editor, click any text or photo on the page to change it right away. To use words instead, open the “AI” tab in the right column, type something like “Change the opening hours to Mon–Fri, 10 am–8 pm”, and click “Ask AI”. It shows “Proposed changes” first, and nothing goes into your draft until you click “Apply”. Check the “Mobile” tab for the phone view, and read anything the AI wrote — hours, prices, address — before you publish.
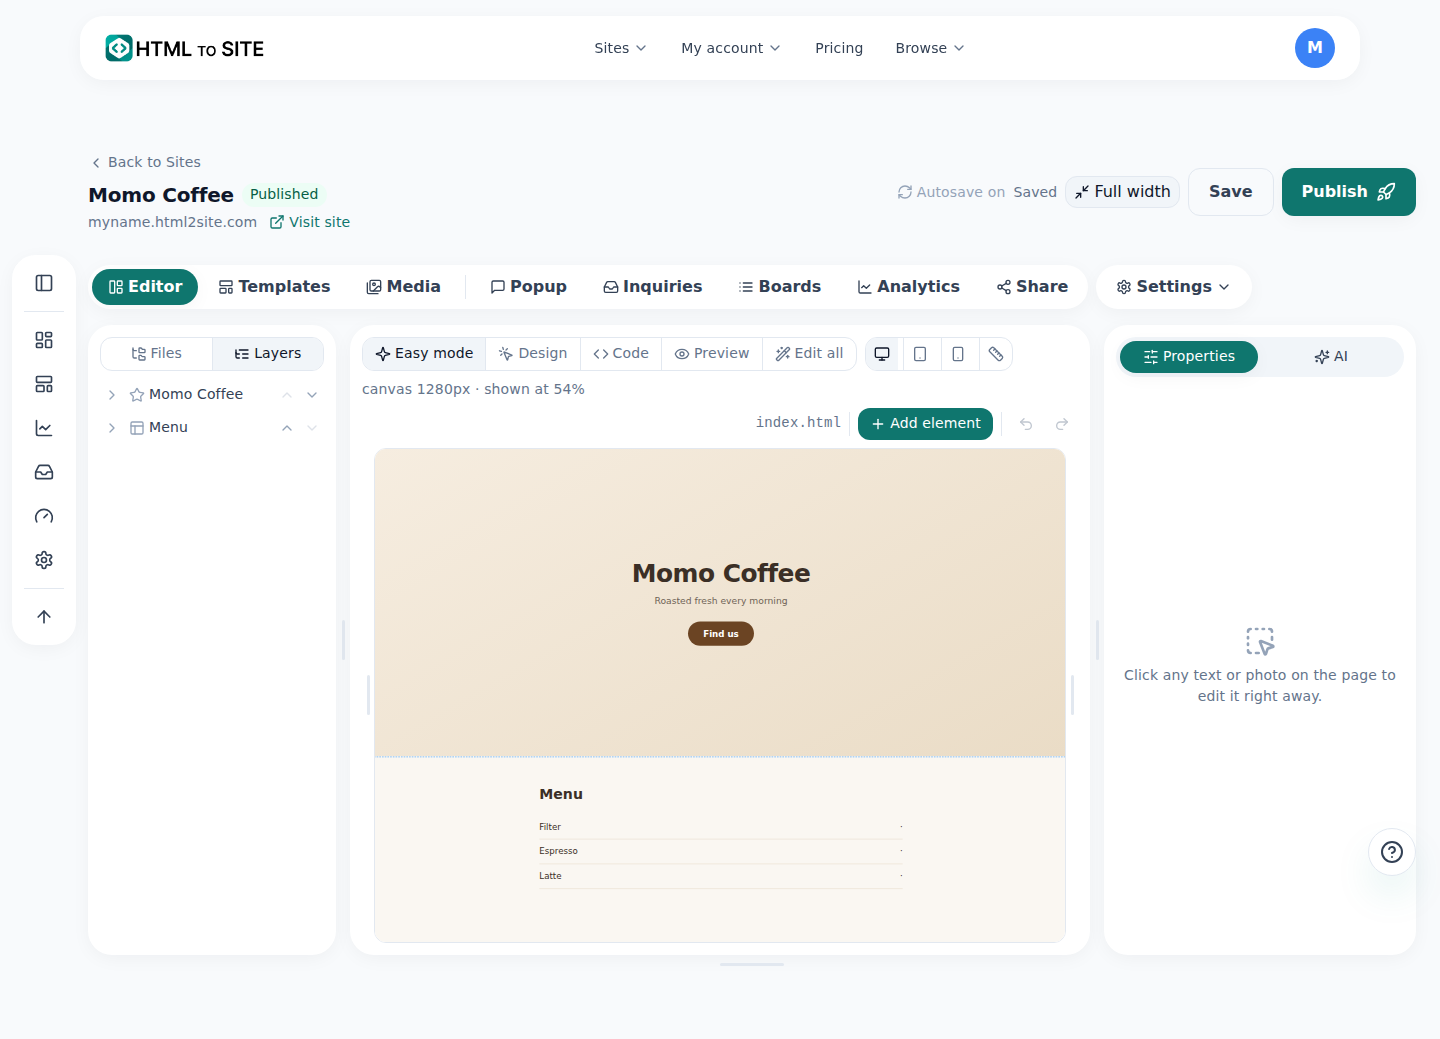
Click text on the page to change it, or ask in the “AI” tab on the right. - 4
Add an inquiry form so customers can reach you
Open “Inquiries” in the editor, switch to the “Forms” view, and click “Add inquiry form” to build a form with name, contact and message fields. Then pick “Inquiry form” in the right column's “Add” tab to place it on your page. Messages from customers collect in “Inquiries” under “Inbox” in the app menu, and the free plan allows two forms per site.
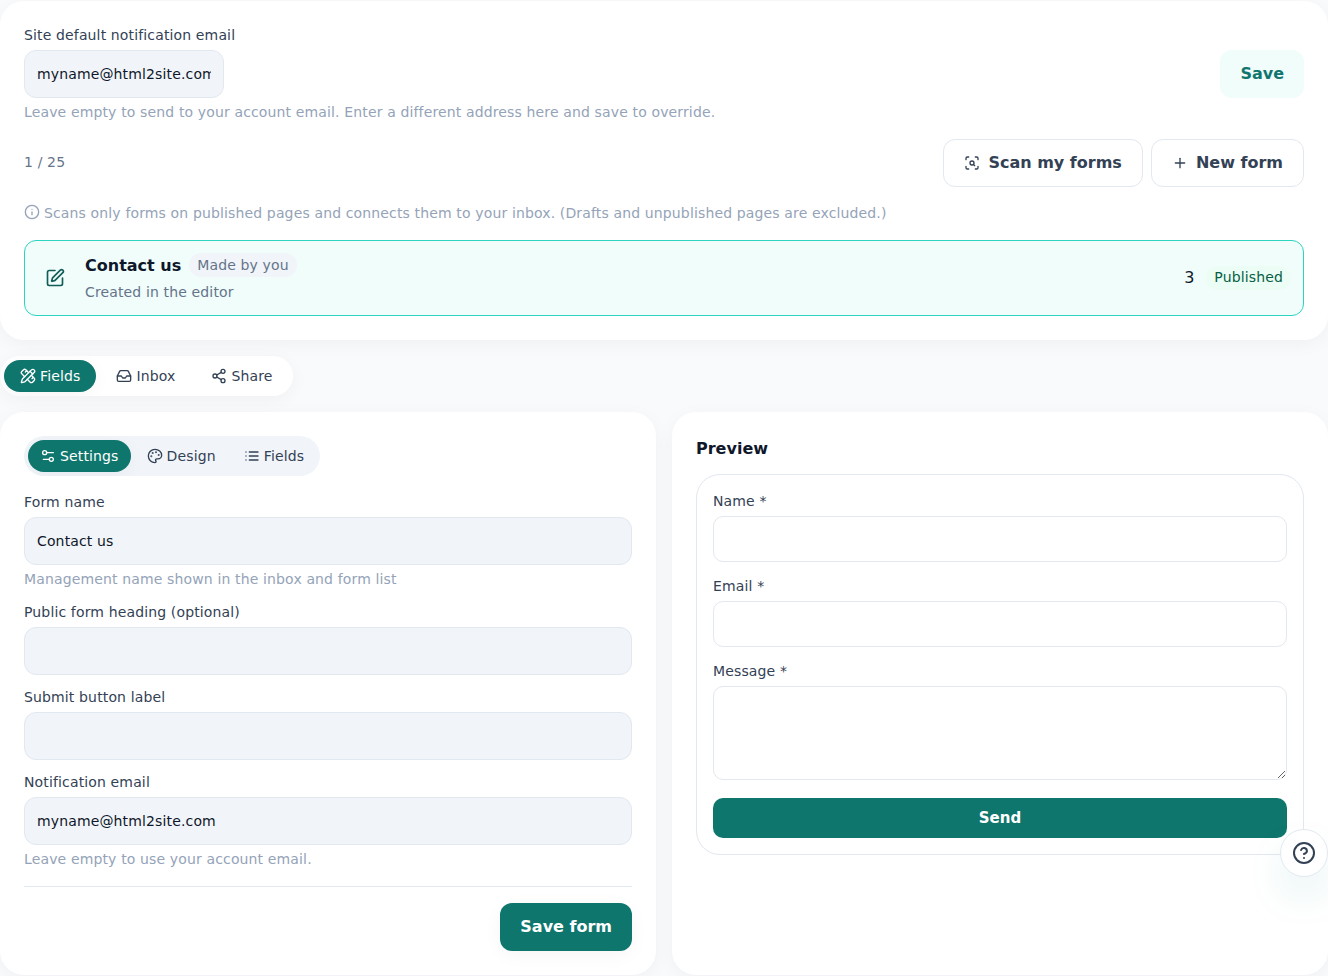
You can read a customer's message and reply right here. - 5
Click “Publish” — connect your own domain only if you want one
When it looks right, click “Publish” at the top of the editor. The site opens right away at an address like myname.mklyr.com, with no card and no time limit, and free sites carry a small “Made with” badge in the bottom-right corner. If you want your shop's own domain, open “Settings”, then “Address & domain”, and click “Connect” — you buy the domain from a domain seller yourself, and connecting it (and removing the badge) starts with the Plus plan.
myname.mklyr.com LivePublish and it opens at this address right away — the same on the free plan.
Frequently asked questions
Can I really build a small business website for free?
Yes. Picking a template, editing, AI editing, an inquiry form and publishing all work on the free plan, and no card is needed. Free sites carry a small “Made with” badge; removing it and connecting your own domain start with Plus.
Do I need to know how to code?
No. Click the text and photos on the page to change them, or ask AI in plain words. The AI shows “Proposed changes” first, and nothing goes into your draft until you click “Apply”.
How will my site look on phones?
Use the Mobile button on a template's detail page and the “Mobile” tab in the editor's right column to preview the phone view. After you publish, open the address on a real phone once as well.
Do I have to buy a domain separately?
The free address (the myname.mklyr.com kind) is enough to get your site online. To use your own domain you buy it from a domain seller, and MakeLayer connects a domain you already own from the Plus plan up.
Can I take my site with me if I move later?
Yes. Open the ⋯ menu on a site card in “My sites” and choose “Download” to get “Working copy (ZIP)” or “Published site (ZIP)”. That works on the free plan too.
Read next
- The template gallery: browse without logging in, edit, then publish How to use the template gallery (/templates) — from login-free browsing to draft, editing, and publishing (English)
- The editor's AI edit assistant: describe it, and it edits the code How the editor's AI edit assistant works — describe changes in plain language, click to point, publish to go live, and how revert really works (English)
- One form for visitor inquiries, one inbox for every site How to build a visitor inquiry form and check every site's inquiries from one Inbox (English)
- Connect your own domain — two DNS records, then it's automatic How to connect a domain you own to a published site and get HTTPS issued automatically (English)
Trying it is faster than reading about it — create your site now, free.